
Welcome to the Honeywell VisionPro 8000 installation guide‚ designed to help professionals and DIYers successfully install and configure this advanced smart thermostat․ This manual covers compatibility‚ wiring‚ setup‚ and troubleshooting‚ ensuring a smooth installation process for optimal performance․
1․1 Overview of the Honeywell VisionPro 8000 Thermostat
The Honeywell VisionPro 8000 is a cutting-edge smart thermostat designed for seamless integration with modern HVAC systems․ It features a high-resolution touchscreen interface‚ RedLINK technology for remote sensors‚ and Wi-Fi connectivity for smart home integration․ This thermostat supports advanced scheduling‚ geofencing‚ and energy-saving modes‚ making it ideal for homeowners seeking precision temperature control․ Compatible with a wide range of heating and cooling systems‚ the VisionPro 8000 offers flexible installation options‚ including wired or battery-powered setups․ Its sleek‚ compact design complements any home decor while providing intuitive navigation for users․ With robust features like automatic changeover and IAQ settings‚ this thermostat delivers unparalleled comfort and efficiency‚ making it a top choice for smart home upgrades․
Pre-Installation Requirements and Preparation
Before installation‚ ensure system compatibility‚ verify power requirements‚ and gather necessary tools․ Check wiring configurations and prepare the site for a smooth setup process․
2․1 Understanding System Compatibility and Wiring Needs
Ensure the Honeywell VisionPro 8000 is compatible with your HVAC system‚ supporting various configurations like heat pumps‚ conventional heating/cooling‚ and multistage systems․ Verify wiring requirements‚ including the need for a common wire (C-wire) for Wi-Fi functionality․ Review the wiring diagram in the manual to match your system’s setup‚ ensuring correct terminal connections (e․g․‚ R‚ W‚ Y‚ G‚ C)․ Proper wiring is crucial for features like RedLINK and Wi-Fi connectivity․ If unsure‚ consult a professional to avoid installation issues and ensure optimal performance․
Physical Installation of the Thermostat
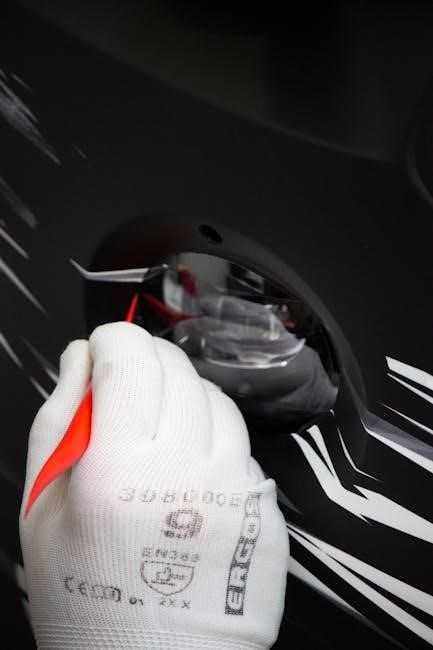
Mount the thermostat by first detaching the wallplate and attaching it to the wall․ Remove the old thermostat‚ ensuring wires are properly labeled․ Secure the wallplate‚ attach the thermostat‚ and ensure it is level for proper operation․
3․1 Mounting the Thermostat and Wallplate
Begin by separating the wallplate from the thermostat․ Mark the wall with a level to ensure proper alignment and drill pilot holes for the screws․ Attach the wallplate securely using the provided screws․ Next‚ align the thermostat with the wallplate‚ ensuring it clicks into place․ Verify the thermostat is level to guarantee accurate temperature readings and functionality․ If necessary‚ adjust the wallplate or thermostat position․ Tighten all connections firmly but avoid overtightening to prevent damage․ Once mounted‚ test the thermostat to ensure it powers on and responds to input․ Proper installation ensures reliable performance and longevity of the Honeywell VisionPro 8000 thermostat․

Wiring and Electrical Connections
Connect the wires to the appropriate terminals on the wallplate‚ ensuring correct wire identification (R‚ W‚ Y‚ G‚ C‚ etc․)․ Refer to the wiring diagram for specific configurations․ Always turn off the power at the circuit breaker before starting․ Secure all connections tightly to avoid loose wires․ Double-check the wiring against the manual to prevent errors․ Use the provided wire labels for clarity․ If unsure‚ consult a licensed electrician to ensure safe and proper installation․ Proper wiring is critical for thermostat functionality and system performance․
4․1 Step-by-Step Wiring Instructions and Diagrams
Start by turning off the power to the HVAC system at the circuit breaker․ Identify the wires from your existing system‚ labeling them accordingly (R‚ W‚ Y‚ G‚ C‚ etc․)․ Refer to the wiring diagram in the manual for terminal connections․ Connect the R (red) wire to the R terminal on the thermostat․ Attach the W (white) wire to the W terminal for heating․ The Y (yellow) wire connects to the Y terminal for cooling․ The G (green) wire links to the fan terminal․ If present‚ connect the C (common) wire to the C terminal․ Ensure all connections are secure and match the diagram․ Double-check the wiring configuration before restoring power․ If unsure‚ consult a licensed electrician to avoid system damage․ Proper wiring ensures safe and efficient thermostat operation․

System Configuration and Setup
Configure installer options‚ unlock the thermostat using the date code‚ and set up schedules․ Access the menu‚ select options‚ and customize settings for optimal system performance and efficiency․
5․1 Configuring Installer Options and Unlocking the Thermostat
To configure installer options and unlock the Honeywell VisionPro 8000 thermostat‚ navigate to the menu by touching the “Menu” option on the screen․ Scroll down to “Dealer Information” and locate the Date Code‚ which serves as the password․ Return to the main menu and select “Installer Options․” When prompted for a password‚ enter the Date Code found earlier․ This unlocks the thermostat‚ allowing access to advanced settings and configurations․ Once unlocked‚ you can customize system parameters‚ such as changeover modes‚ temperature adjustments‚ and scheduling options‚ to optimize performance and ensure compatibility with your HVAC system․ Proper configuration is essential for reliable operation and energy efficiency․

Advanced Features and Customization
The Honeywell VisionPro 8000 offers advanced features like Wi-Fi connectivity‚ customizable schedules‚ and system settings․ Users can tailor temperature controls‚ energy-saving modes‚ and smart home integrations for enhanced comfort and efficiency․
6․1 Setting Up Wi-Fi Connectivity and Schedules
To connect the Honeywell VisionPro 8000 to Wi-Fi‚ navigate to the menu‚ select Wi-Fi options‚ and enter your network password․ Once connected‚ you can access remote features․ For scheduling‚ go to the menu and choose “Set Schedule” to create up to 7-day programs․ Define temperature settings for different times to optimize comfort and energy use․ Save your preferences to ensure the schedule runs automatically․ Use the thermostat’s touch screen or the Honeywell Home app for additional customization and monitoring․ These features enhance convenience and energy efficiency‚ allowing you to manage your home’s climate effortlessly․
Maintenance and Troubleshooting
Regularly clean the thermostat’s screen and sensors for optimal performance․ Check wiring connections and reset the system if issues arise․ Refer to the manual for common fixes․
7․1 Common Issues and Solutions
Common issues with the Honeywell VisionPro 8000 include screen brightness malfunctions‚ password entry problems‚ and Wi-Fi connectivity loss․ For brightness issues‚ check the backlight settings or ensure proper power supply․ If the thermostat asks for a password repeatedly‚ verify the date code entry or reset the device․ Connectivity problems can often be resolved by restarting the router or ensuring the thermostat is correctly linked to your network․ Clean the sensors regularly to avoid inaccurate temperature readings․ If these steps fail‚ consult the manual or contact Honeywell support for further assistance․ Always refer to the troubleshooting guide for detailed solutions to ensure optimal performance․
With the Honeywell VisionPro 8000 installation manual guiding you through each step‚ successful installation and setup are achievable․ This advanced thermostat enhances home comfort with smart features like Wi-Fi connectivity and customizable schedules․ Proper installation ensures energy efficiency and system reliability․ By following the manual’s instructions‚ you can unlock all the benefits of this innovative device․ If issues arise‚ refer to the troubleshooting section for quick solutions․ Enjoy the convenience and savings that come with the VisionPro 8000‚ designed to meet your heating and cooling needs effectively․ Remember to regularly maintain and update your system for optimal performance and longevity․